How to install Windows Server 2025
You can download Windows Server 2025 evaluation version iso file from the Microsoft Evaluation Center webpage. You may need to register for the Windows Server 2025 evaluation programme, before downloading Windows Server 2025 evaluation version iso file. Please click the following link visit and download Windows Server 2025 from Microsoft Evaluation Center.
Please visit the following link to learn how to download Windows Server 2025 installation iso file from Microsoft Evaluation Center.
Just copying the Windows Server 2025 installation iso file into a DVD or a USB disk is not enough to make a bootable installation media. Windows Server 2025 installation iso file must be burned into a DVD or USB drive for making the DVD or USB disk a bootable installation media.
There are many third-party free tools available for download to burn image files in Windows 10/Windows 11. In Windows 10/Windows 11, you may right-click the installation image file and select "Mount" to mount the image to a new virtual disk drive, or select "Burn disk image" from the context menu, to burn the disk image.
Step 01 – Insert your Windows Server 2025 installation media (DVD Drive or USB storage) in to the computer’s DVD drive or USB port. Make sure your computer’s BIOS/UEFI is configured to boot from the exact drive location where you have the Windows Server 2025 installation media. Power-on the computer to boot from the disk drive, where you have the Windows Server 2025 bootable installation media.
When the initial screen appears, press any key to boot the computer from the bootable DVD or USB disk. Please refer below image.

Step 02 – Now, select an Operating System to start. In this case, it is Windows Server 2025 setup. After selecting the Operating system, press the "Enter" key.
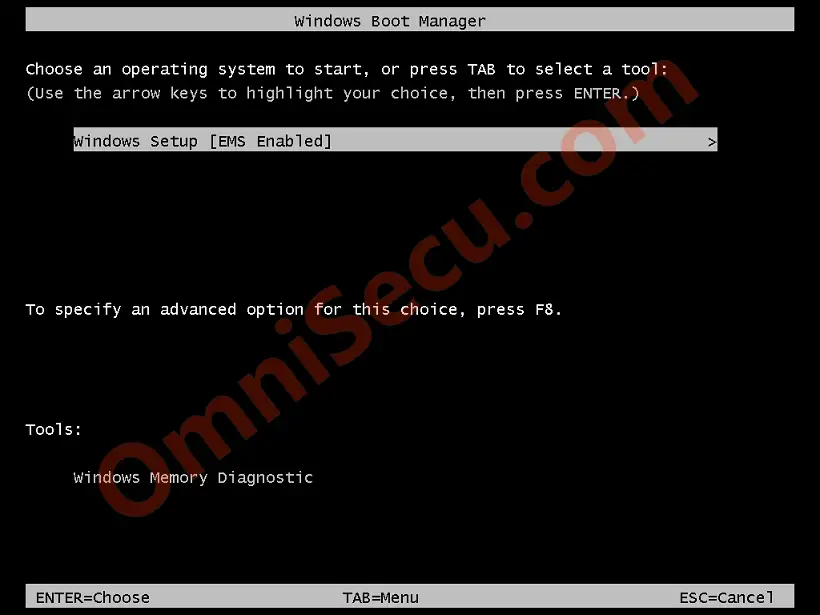
Step 03 – Windows 2025 Server setup is booting up now. You may see a screen as shown below.

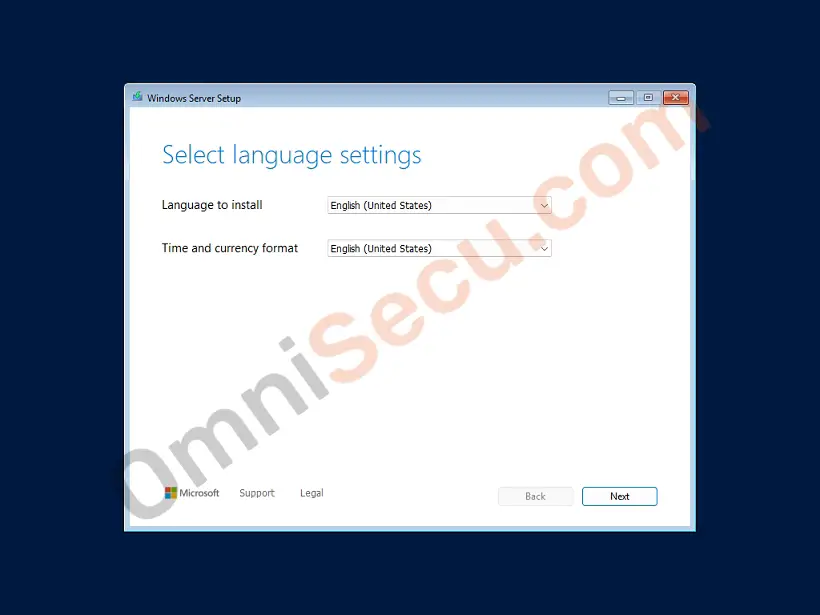
Step 04 –Select the language, time and currency format for your Windows Server 2025 installation, in the next screen. Please refer the below image.
Click the "Next" button.
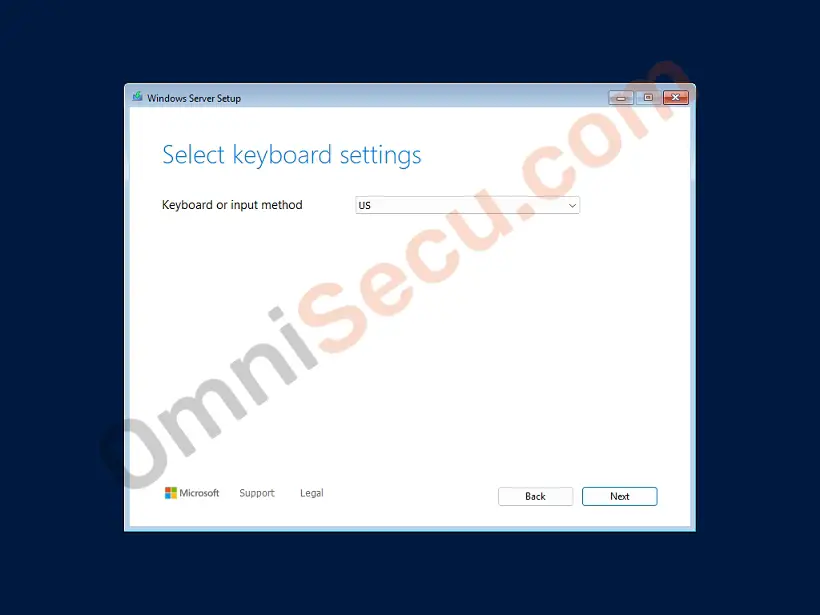
Step 05 – Select the keyboard settings you want to use. After selecting the keyboard settings, click the "Next" button, as shown in the below image.
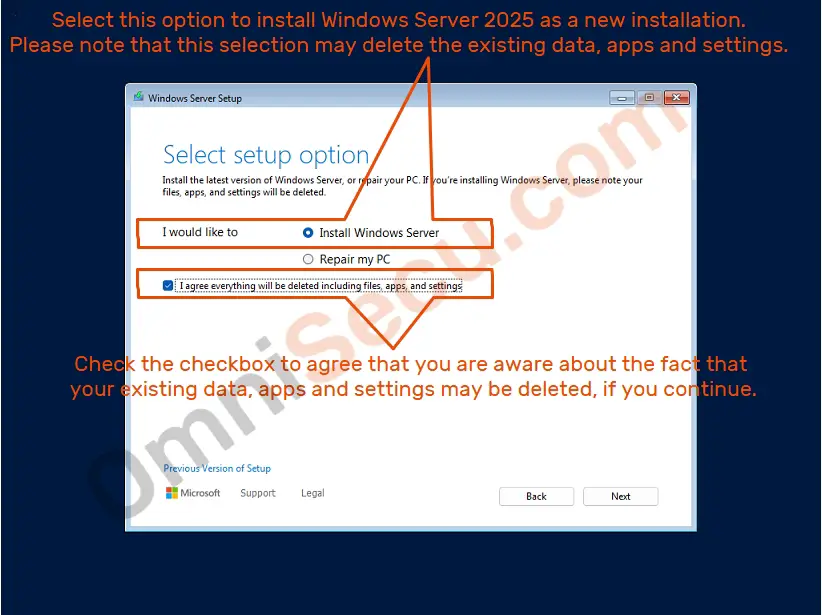
Step 06 – Select "I would like to Install Windows Server" option to install Windows Server 2025 as a fresh new installation. Please note that this selection may delete the existing data, apps and settings. Please backup all the required important files, apps or settings before proceeding.
Check the checkbox "I agree everything will be deleted including files, apps and settings" to agree that you are aware the fact that this selection may delete all the existing data, apps and settings.
Click the "Next" button to continue.
Step 07 – Type-in your Windows Server 2025 product key to activate your Windows Server 2025 now. The product key is usually available with your installation media. Please note that the "Next" button will be enabled only if you type-in the correct product key for your Windows Server 2025 installation media.
Click the "Next" button to continue.
Click "I don’t have a product key" link, if you do not have a product key during the installation stage. Later, you must purchase a Windows Server 2025 product key from Microsoft to activate Windows Server 2025.
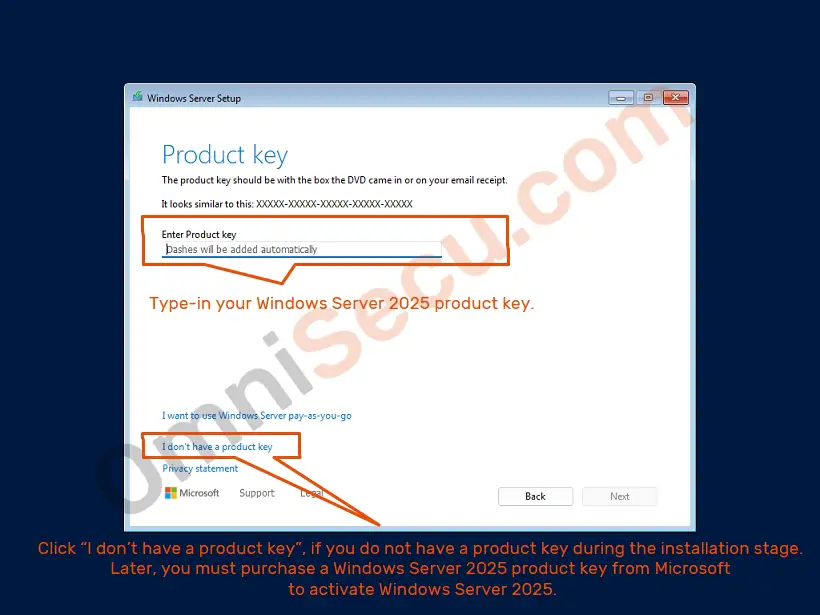
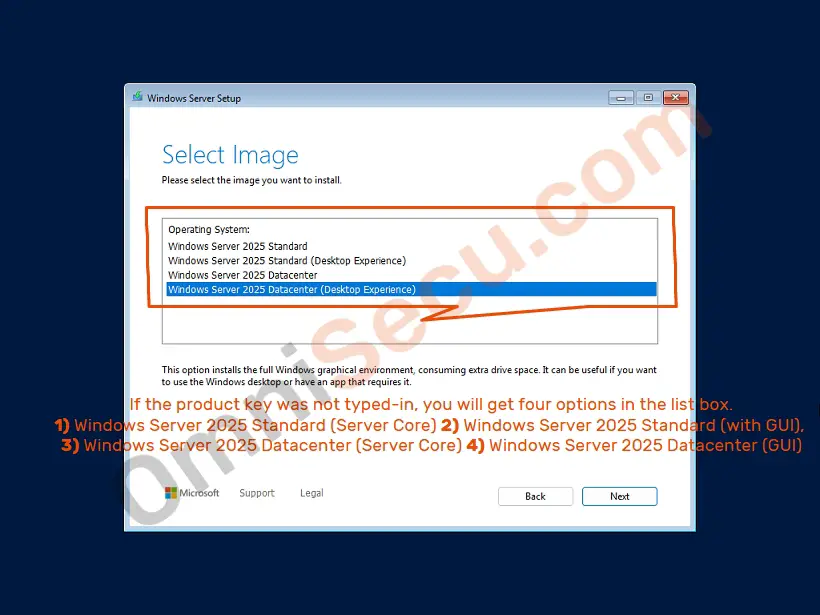
Step 08 – If you had not typed-in a product key for Windows Server 2025, the setup will show all the available installation options for your Windows Server 2025. You may select the option you want at this stage and later you can buy the product key from Microsoft to activate Windows Server 2025.
Four available installation options are
- Windows Server 2025 Standard (Server Core)
- Windows Server 2025 Standard (with Graphical User Interface)
- Windows Server 2025 Enterprise (Server Core)
- Windows Server 2025 Enterprise (with Graphical User Interface)
Please refer below image.
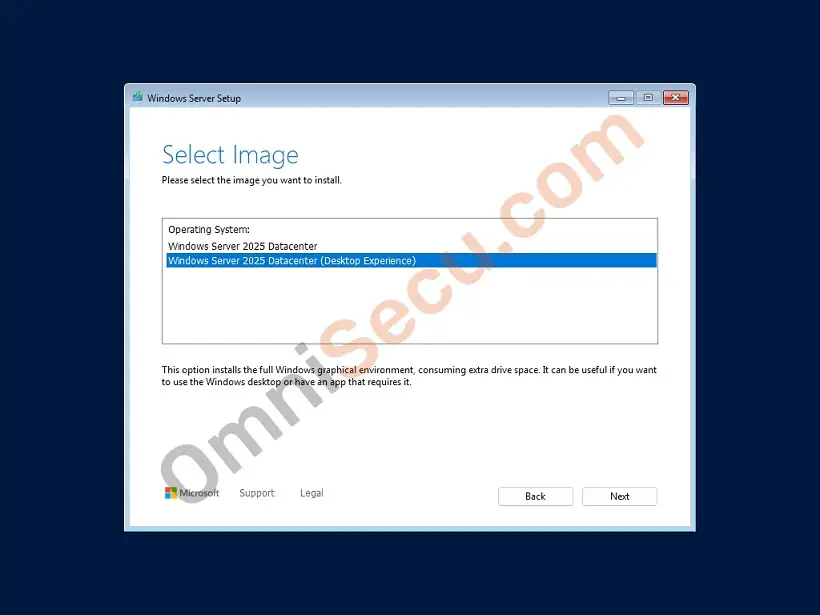
If you have the proper product key typed-in for your Windows Server 2025 installation media, the setup will show the options available for your Windows Server 2025 product key. You may select the correct installation option you need at this stage.
Note that the product key I had typed–in is for Windows Server 2025 Datacenter. First entry shown in the listbox in below image is for Windows Server 2025 Datacenter Server Core installation and the second entry shown in the listbox is for Windows Server 2025 Desktop Experience (with Graphical User Interface).
Click the "Next" button after selecting the installation option to continue the Windows Server 2025 installation. In this example, I had selected Windows Server 2025 with Graphical User Interface (the second entry in the listbox, Windows Server 2025 Datacenter Desktop experience).
Please refer the following screenshot.
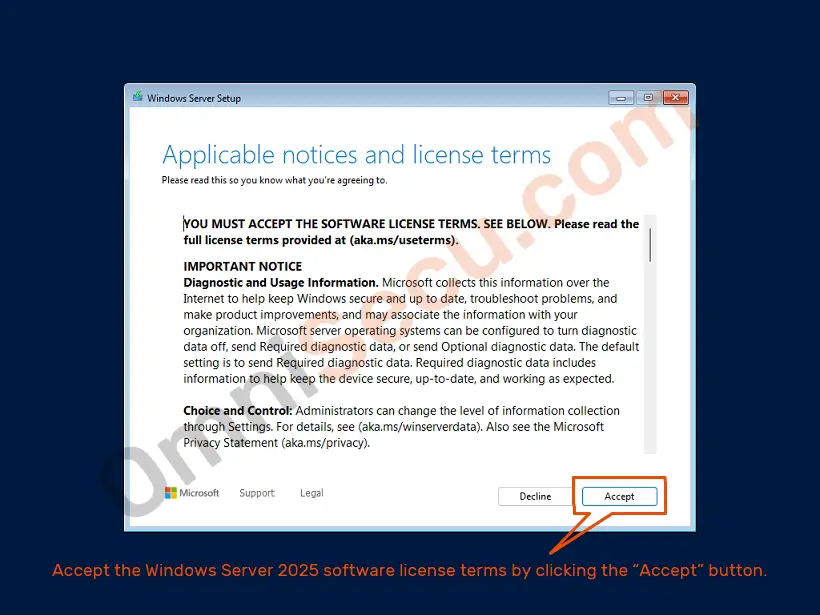
Step 09 – You must accept the applicable notices and license terms in this screen.
Click "Accept" button to accept the Windows Server 2025 software license terms and to continue the installation.
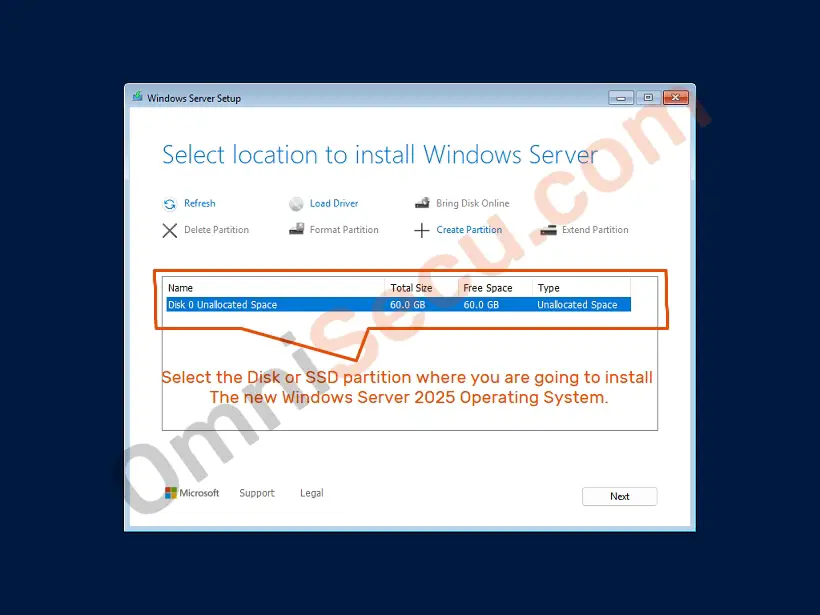
Step 10 – In this screen, select the location to install Windows Server 2025. In this example, there is only a 60GB disk in this virtual machine and I am using that disk to install Windows Server 2025.
There are many other options also available in this screen. You may create or delete partitions in your disk or load third-party drivers in this screen.
After selecting the location to install Windows Server 2025, click "Next" button to continue the installation in ready-to-install screen.
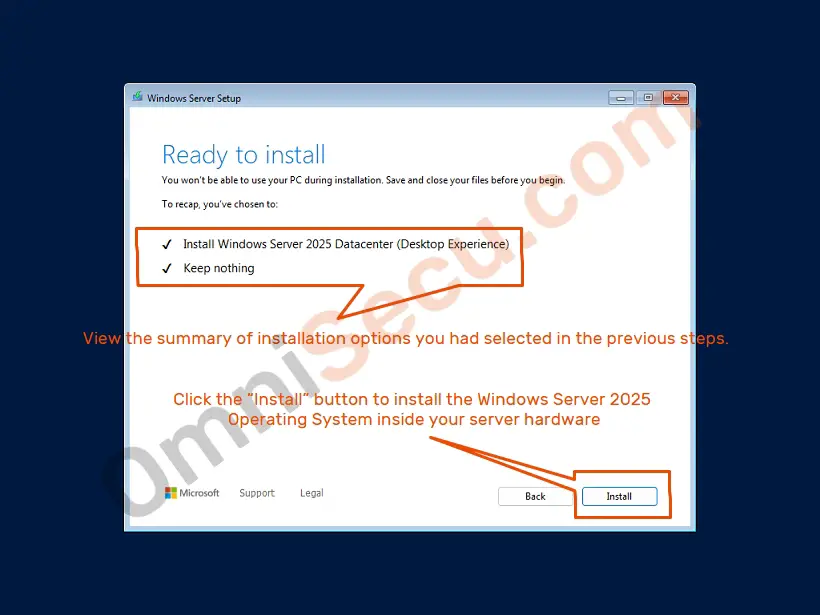
Step 11 – View the summary of installation options you had selected in the previous steps in "Ready to install" screen.
Click the "Install" button to install the Windows Server 2025 Operating System. Please refer below image.
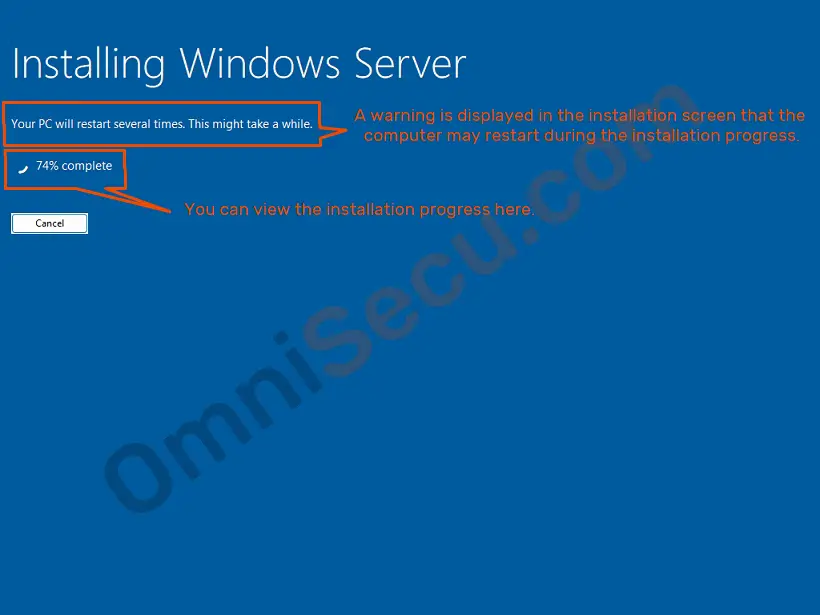
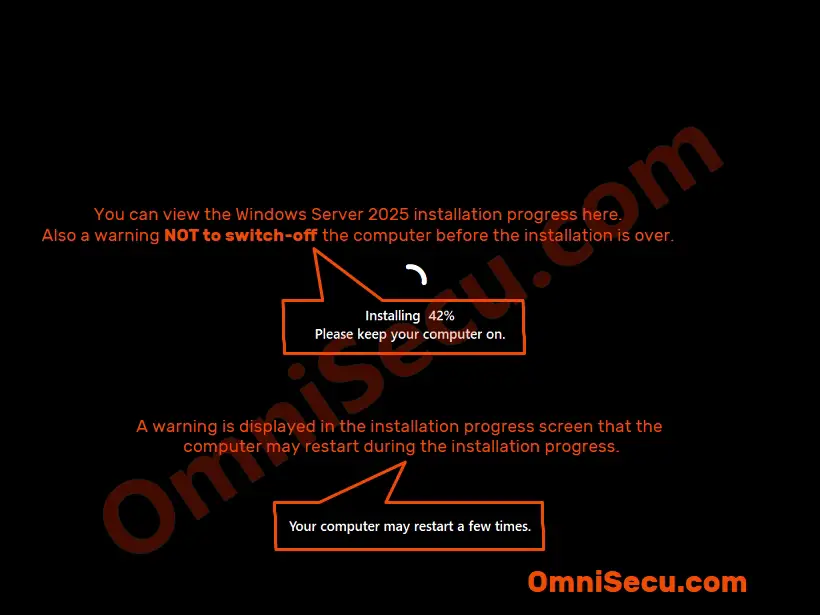
Step 12 – Next screens display the installation progress of Windows Server 2025 in your computer. Your computer may restart during this time.
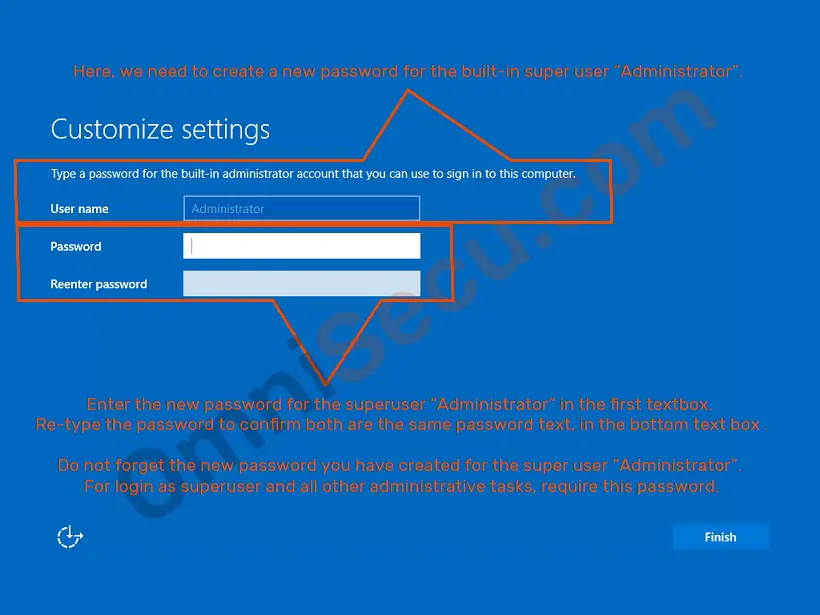
Step 13 – Enter a new password for the built-in superuser "Administrator" and confirm the password by re-entering it. You must remember this new password for the built-in superuser "Administrator". This new password is required for the built-in superuser "Administrator" to login to the computer and to perform all other administrative tasks.
Click the "Finish" button to finish the Windows Server 2025 Operating System installation.
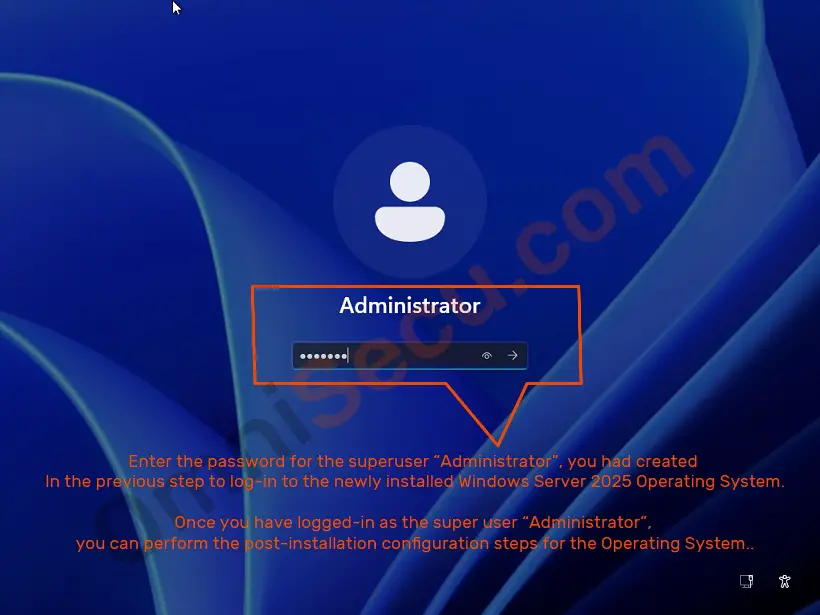
Step 14 – After a restart, you can login to the new Windows Server 2025 Operating System as built-in superuser "Administrator", by providing the password you had created for the user "Administrator" in the previous step.
Step 15 – Have a look at below image!!! This is how the elegant all-new Desktop of the mighty Windows Server 2025 Operating System looks like.
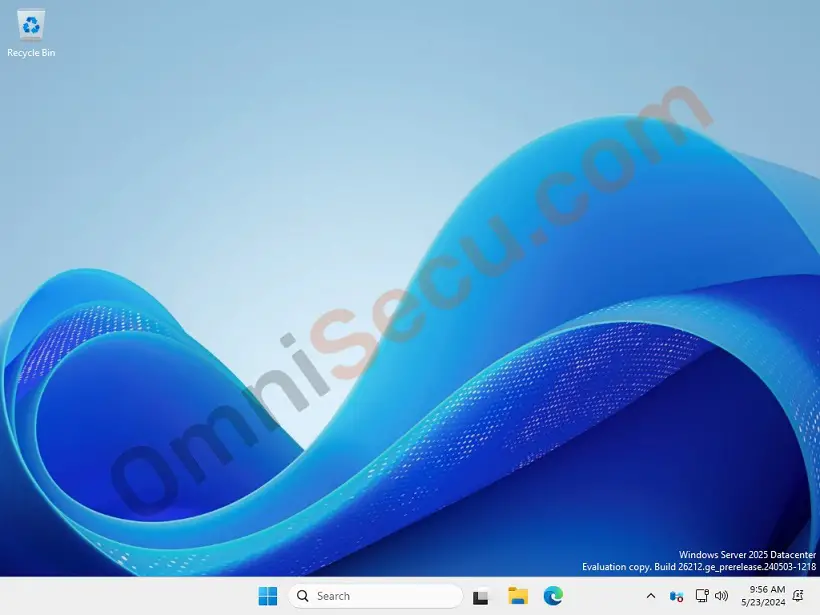
Your Windows Server 2025 installation is over and now you can start configuring the server.
Written by Jajish Thomas.
Last updated on 27th May, 2024.