Add a snapin to MMC console
We had learned about MMC console in the previous lesson. Microsoft Management Console (MMC) app is used mainly to perform administrative tasks in Windows Operating Systems. We need to add any available snap–in file to MMC console for the different functionalities required for administrative tasks. Most of the administrative tools are written as MMC snap–in files. Please visit the following link, If you are not sure what is Microsoft Management Console (MMC).
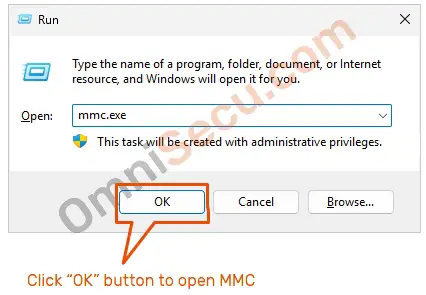
Step 01 – Open MMC by typing mmc.exe in your Windows Run dialog box and then by clicking the "OK" button. Please refer below image.
Click the following link to learn about different ways to open MMC.
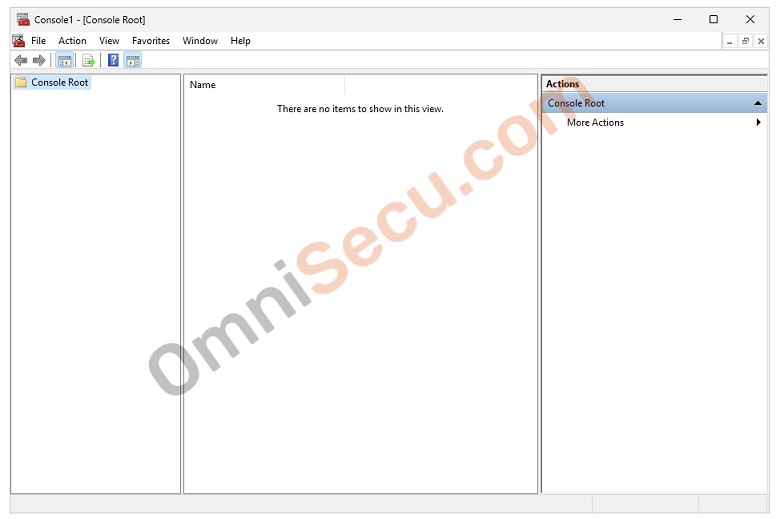
Step 02 – MMC with no snap–in will be opened as shown in below screenshot.
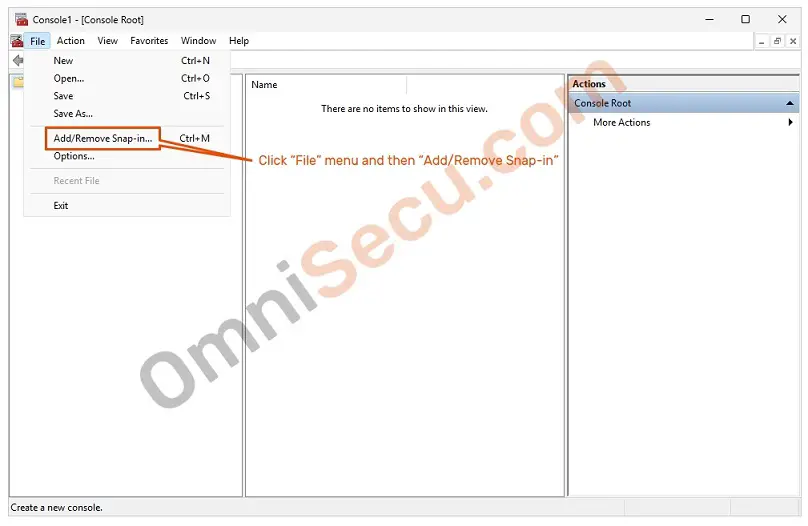
Step 03 – Click "File" menu and then "Add/Remove Snap-in", as shown in the below screenshot.
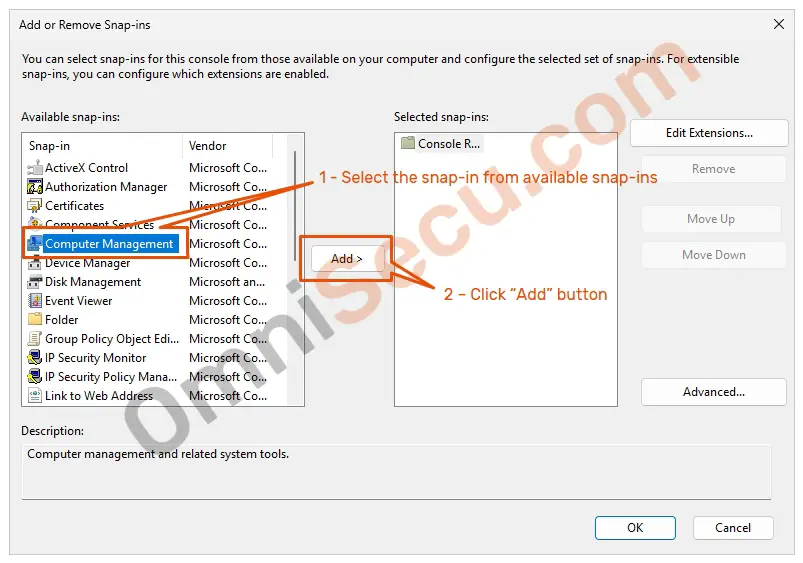
Step 04 – "Add or Remove Snap–ins" dialog box will be opened as shown below. Select the required snap–in from the available snap–in list, and then click the "Add" button as shown in below screenshot.
In this example, I had selected "Computer Management" MMC snap–in.
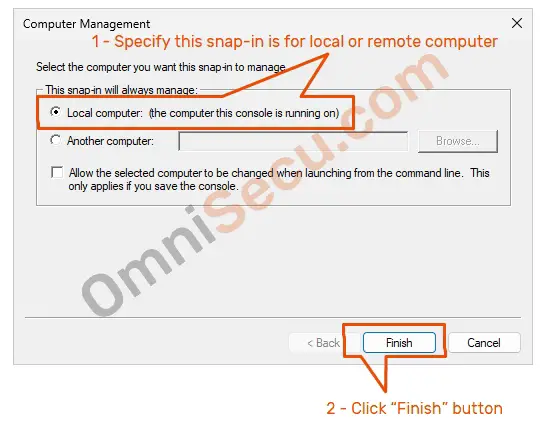
Step 05 – Specify the snap–in selected is for managing local or remote computer. In this example, I had selected the snap–in is for local computer management.
Click the "Finish" button as shown in the below screenshot.
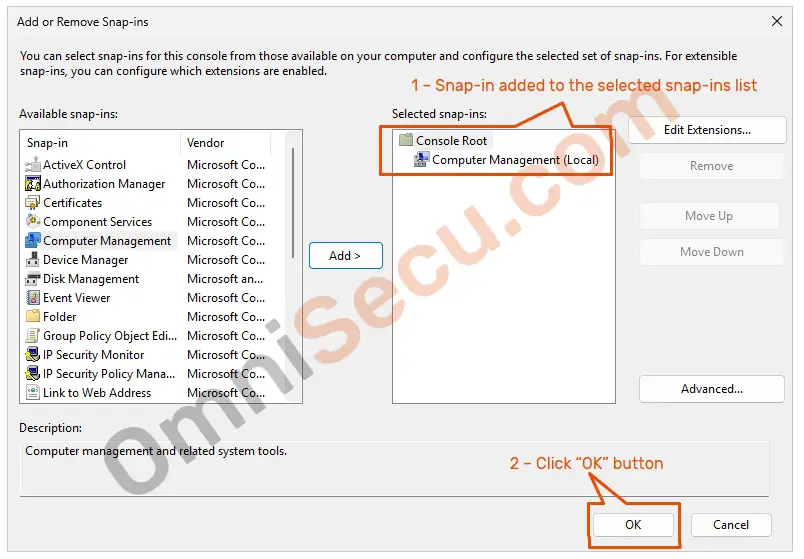
Step 06 – Verify that the snap–in is added to the selected snap–ins list.
Click "OK" button as shown in the below screenshot.
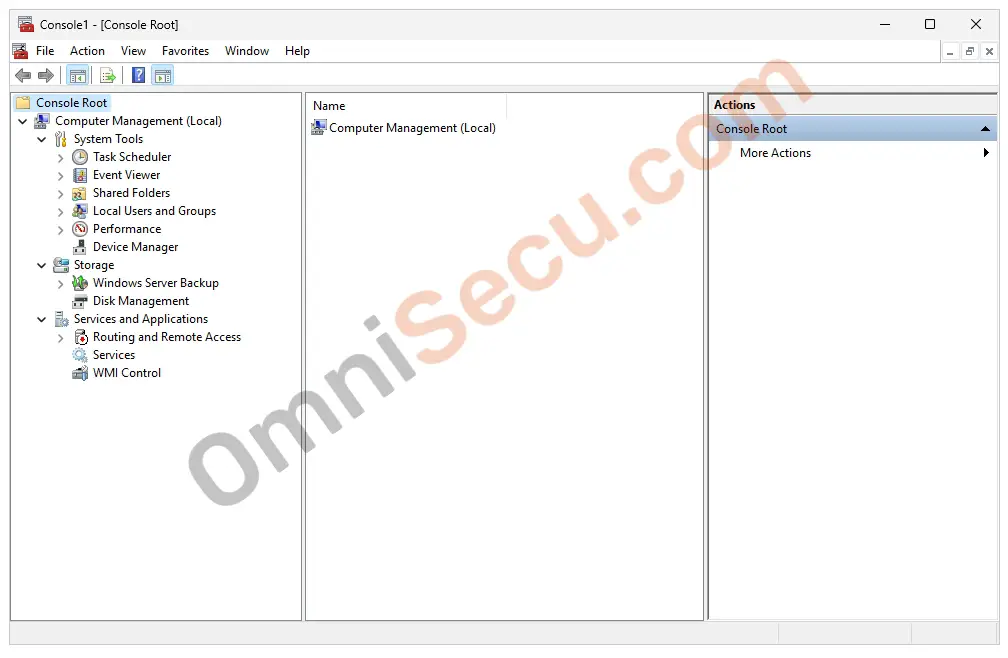
Step 07 – Verify that the "Computer Management"snap–in is added to MMC console.
In this example, "Computer Management (Local)" MMC snap–in is added to MMC console, as shown in below screenshot.
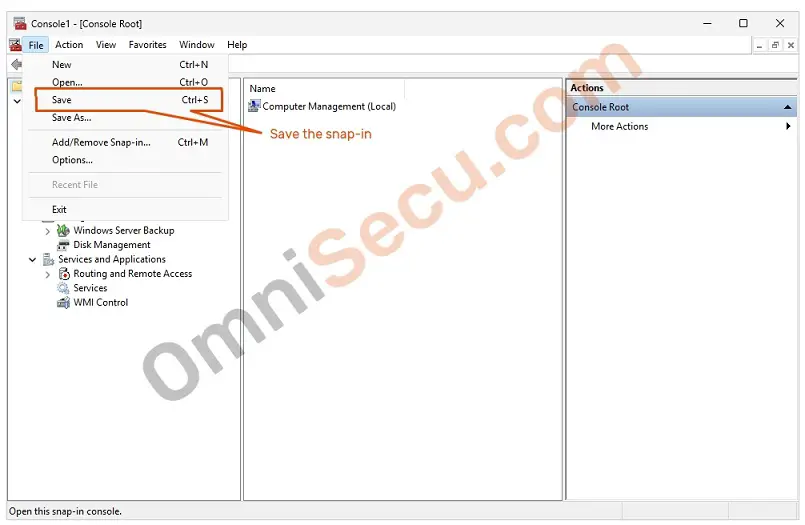
Step 08 – If you want to save the snap–in added to MMC console at your desired file location, click "File" menu and then click "Save" as shown in below screenshot.
Written by Jajish Thomas.
Last updated on 6th July, 2024.