How to create a local user in Windows Server
We had discussed about local user accounts in previous lessons. Please click the following links to learn about local user accounts and different types of user accounts in Windows Server. Now, let us learn how to create a local user account in Windows Server.
Create a local user using Computer Management MMC snap–in
Follow below steps to create a local user in Windows Server 2025.
You can use the Computer Management MMC snap–in in Windows Server 2025 to create a new local user account. To open Computer Management MMC snap–in, type compmgmt.msc in Windows Run dialog box and then click the "OK" button. Another way to open the Computer Management MMC snap–in is, search for compmgmt.msc in Windows Search box and then click the search result.
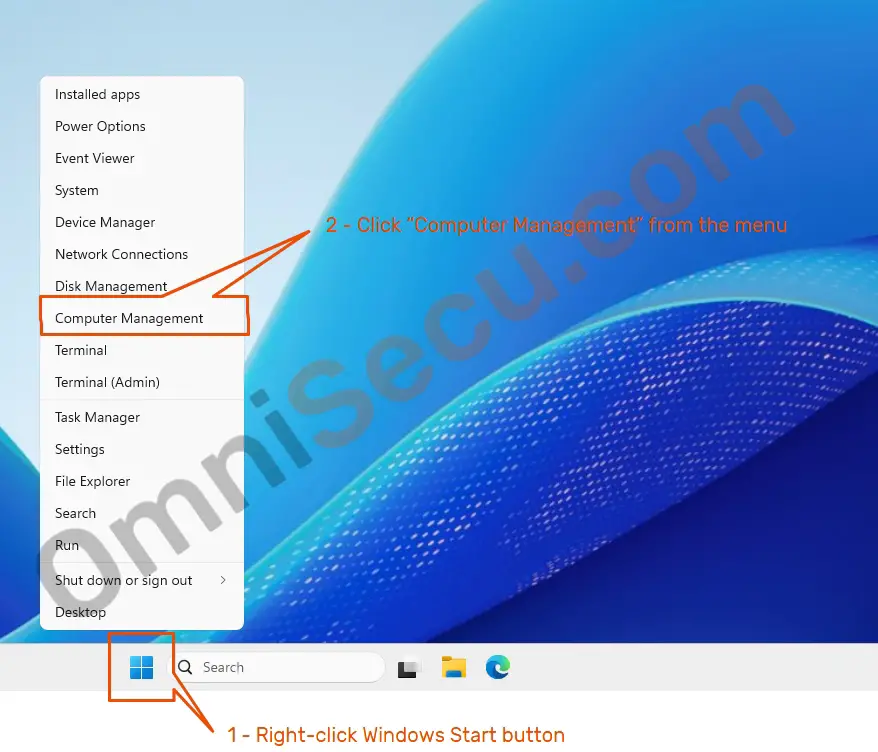
Step 01 – Open Computer Nanagement MMC snap–in by right–clicking the Windows Start button and then by clicking the Computer Management menu item, as shown below.

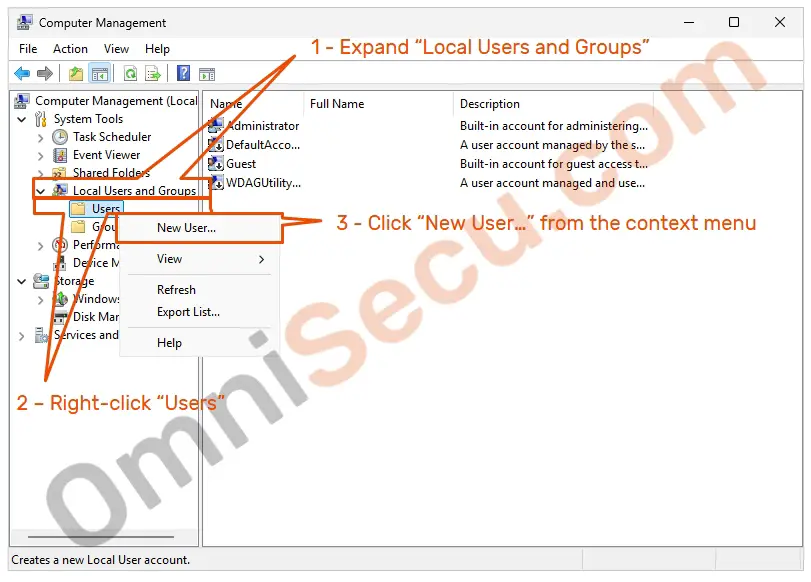
Step 02 – Expand "Local Users and Groups" in Computer Management (Local) tree. Right–click the "Users" folder and then select "New User…" menu item by clicking "New User…" from the context menu. Please refer below screenshot.

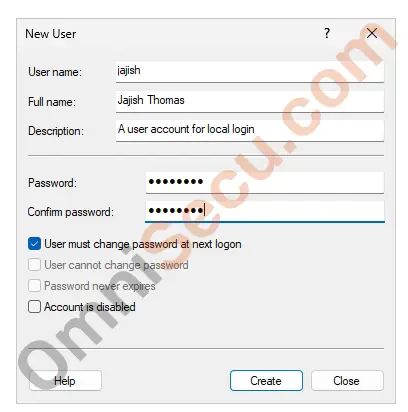
Step 03 – The "New User" window will be opened as shown below. Enter the "User Name" (user id), "Full name", "Description", "Password" and then the password options for the new local user account. There are four password options (checkboxes), as shown in below image below.
- User must change password at next logon – The new local user must create a new password when he login for the first time.
- User cannot change password – If you select this option, the new user cannot change his new password set during user creation.
- Password never expires – If you select this option, the new password set during user creation will never expire.
- Account is disabled – If you select this option, the new account created will be disabled and the new user cannot login to the Windows Server Operating System.
After selecting the required password options, click the "Create" button to create the new user, as shown in the below image screenshot.

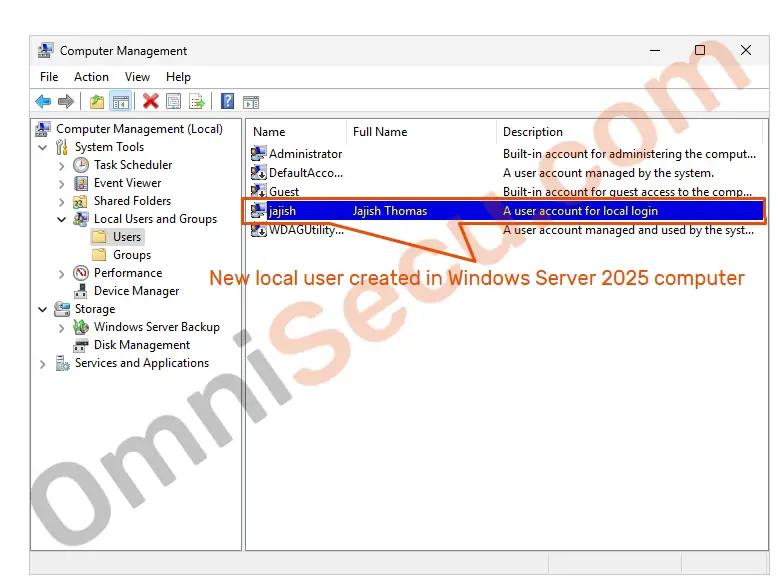
Step 05 – Verify that the new local user is created inside "Users" folder of the Computer Management snap–in in Windows Server 2025 computer as shown below. You can see that the new local user with the user name "jajish" is created, as shown in the below image.
If you cannot find the new local user account created inside the "Users" folder, just refresh the "Users" folder by right–clicking inside the "Users" folder and then by clicking the "Refresh" menu item from the context menu.


Written by Jajish Thomas.
Last updated on 18th July, 2024.