How to configure IPv4 address in Windows Server 2025 using PowerShell Cmdlets
Following steps explain how to configure TCP/IPv4 settings like IPv4 address, Subnet Mask, Default Gateway address, and DNS Server addresses in Windows Server 2025, using PowerShell Cmdlets.
Step 1 - You must run PowerShell as the user "Administrator", to configure IPv4 address in Windows Server 2025. Make sure that you have logged-in as the user "Administrator" or you have logged-in as a user with administrative privileges to configure an IPv4 address.
Please visit following link to learn how to run PowerShell as administrator in a Server Core computer.
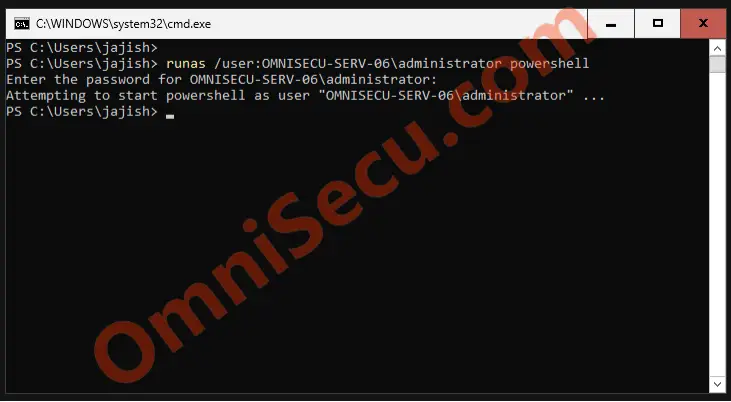
Step 2 – In a Windows Server 2025 Server Core installation, use "runas" command from cmd or PowerShell, to run PowerShell as administrator. Enter the password of administrator, when prompted. A PowerShell terminal window, with administrative privileges, will be opened once the "runas" command is run successfully.
C:\Users\jajish>runas /user:OMNISECU-SERV-06\administrator powershell
Enter the password for OMNISECU-SERV-06\administrator:
Attempting to start powershell as user "OMNISECU-SERV-06\administrator" ...

C:\Users\jajish>
Please refer following screenshot.
Step 3 – Now, you need to identify the InterfaceIndex number of the network adapter, where you are going to configure IPv4 address, using PowerShell Cmdlets. Use Get-NetAdapter PowerShell cmdlet as shown below to get the InterfaceIndex number of the network adapter where you want to configure IPv4 address.
Get-NetAdapter | Format-List
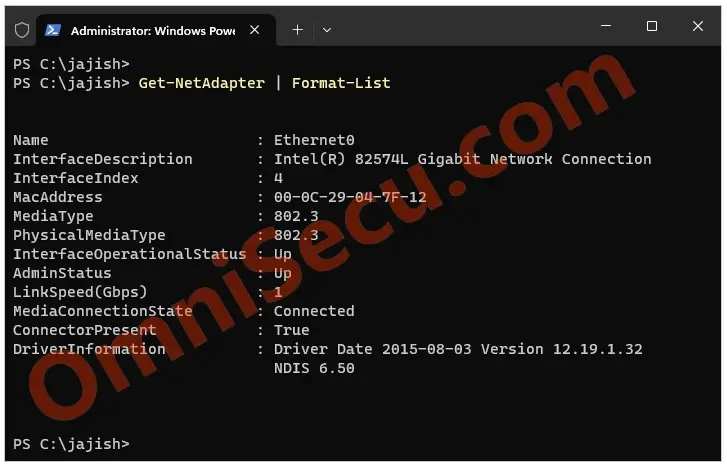
In this case, we have only one network interface in this computer. As you can see from the above output of Get-NetAdapter PowerShell cmdlet, the InterfaceIndex number is 4. We need to properly identify the network adapter and note it’s InterfaceIndex number. Every time when a PowerShell cmdlet related with this network adapter is run, we need to provide the InterfaceIndex number (in this case, the InterfaceIndex number is 4).
Step 4 - Once we had identified the network adapter and its InterfaceIndex number, we can use PowerShell "New-NetIPAddress" cmdlet to configure a new IPv4 address and Default Gateway address. You can see from the below PowerShell cmdlet, you need to provide InterfaceIndex number when you run the cmdlet, to identify the network adapter.
From the below cmdlet, you can understand that the IPv4 address we are configuring now is 172.16.100.101, subnet mask is 255.255.255.0 (-PrefixLength 24) and Default Gateway address we are configuring is 172.16.100.1. Change the IPv4 address and other related settings as per your requirement.
New-NetIPAddress -InterfaceIndex 4 -IPAddress 172.16.100.101 -PrefixLength 24 -DefaultGateway 172.16.100.1
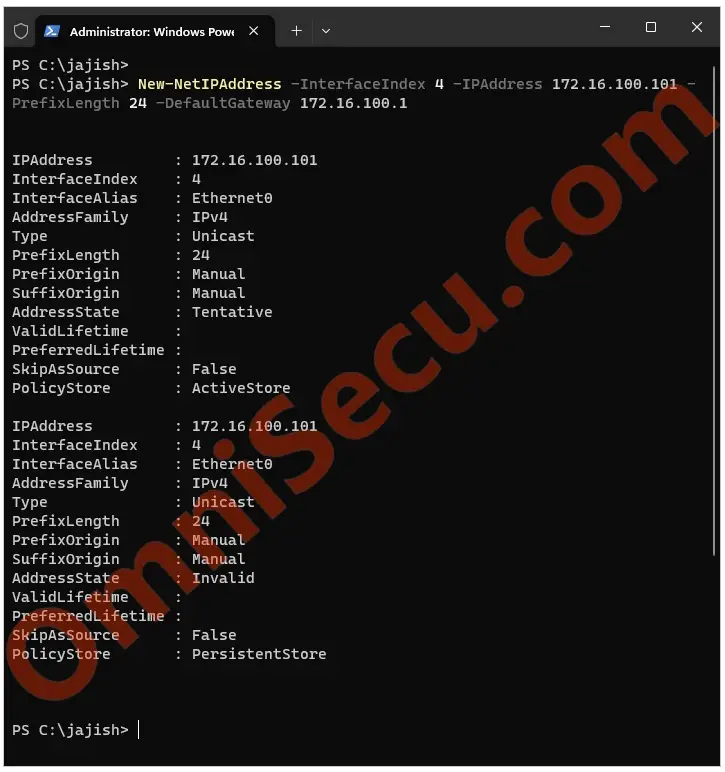
Step 5 - Now we have configured a new IPv4 address and Default Gateway address for the network adapter with InterfaceIndex number 4. To check whether the IPv4 address is configured properly, use PowerShell "Get-NetIPAddress" cmdlet as shown below.
Get-NetIPAddress -InterfaceIndex 4 -AddressFamily IPv4
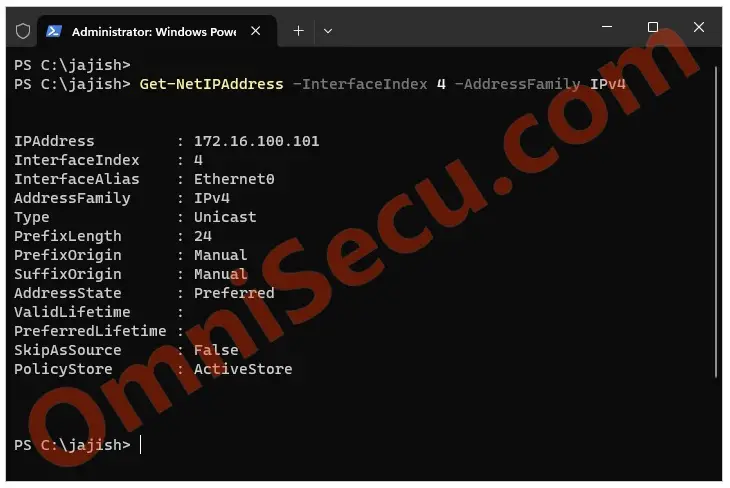
From the above "Get-NetIPAddress" cmdlet output, we can see that the IPv4 address configured is 172.16.100.101. Now, to check whether Default Gateway address is configured properly, use "Get-NetRoute" command as shown below.
Get-NetRoute -InterfaceIndex 4 -AddressFamily IPv4 -DestinationPrefix "0.0.0.0/0"
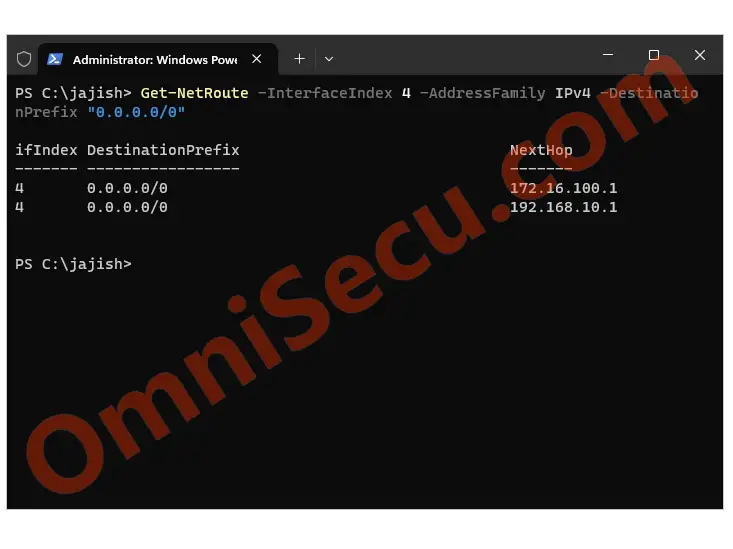
From the above cmdlet output, we can see that the Default Gateway address configured is 172.16.100.1.
Step 6 - Last TCP/IP setting we are going to configure is DNS server addresses. Use "Set-DnsClientServerAddress" PowerShell cmdlet to configure DNS Server addresses, as shown below.
Set-DnsClientServerAddress -InterfaceIndex 4 -ServerAddresses 8.8.8.8, 8.8.4.4
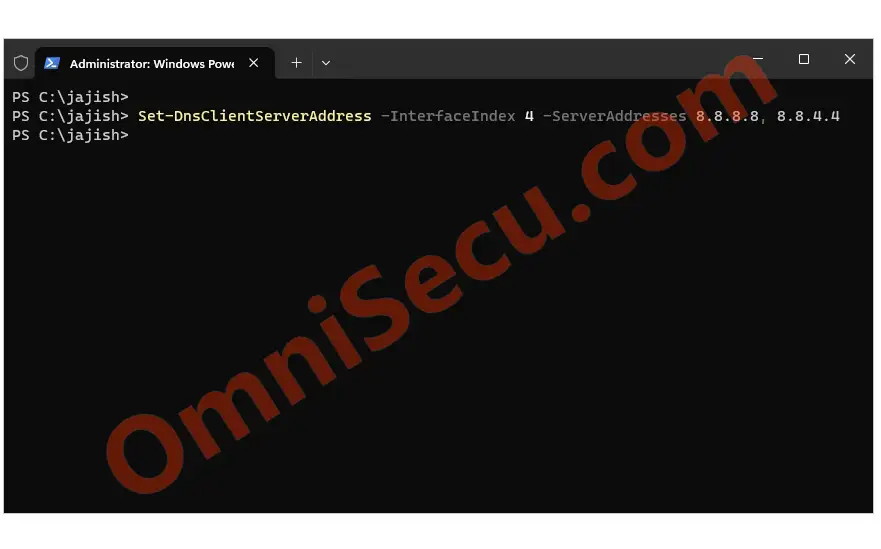
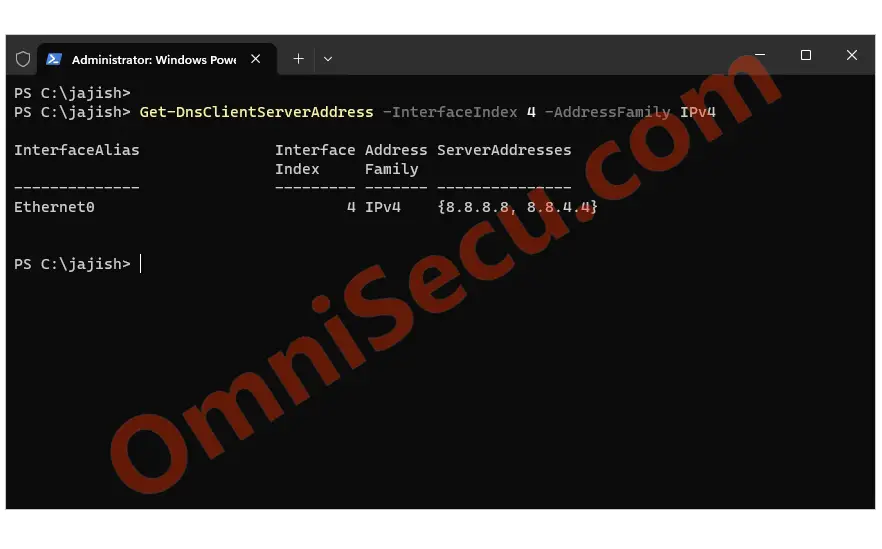
Step 7 - To check whether the DNS Server addresses are configured properly, use PowerShell "Get-DnsClientServerAddress" cmdlet as shown below.
Get-DnsClientServerAddress -InterfaceIndex 4 -AddressFamily IPv4
