How to rename a computer using Windows Explorer
Windows Server Operating System generates a random computer name for your server during installation. You may need to change the meaningless default random computer name generated by the Windows Server setup program. You can use Windows Explorer to rename your computer. Before renaming the computer, you may need to view the current name of the Windows Server, generated during installation.
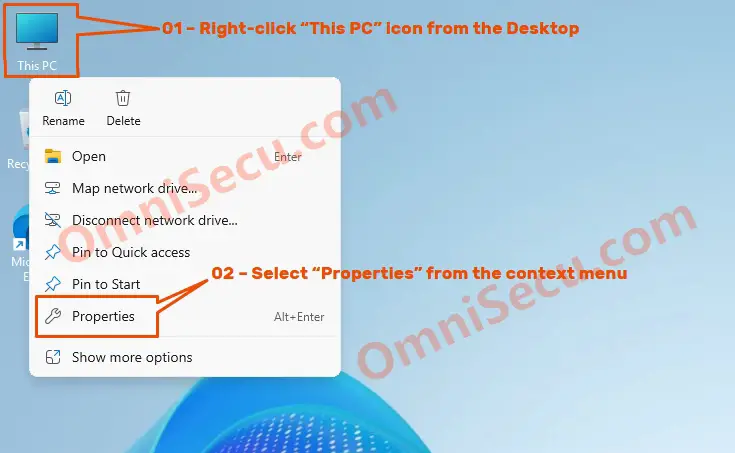
Step 01 – You can view the current computer name (before renaming the computer) by right-clicking "This PC" icon from the Desktop and then by clicking the "Properties" from its context menu.
Please refer below image.

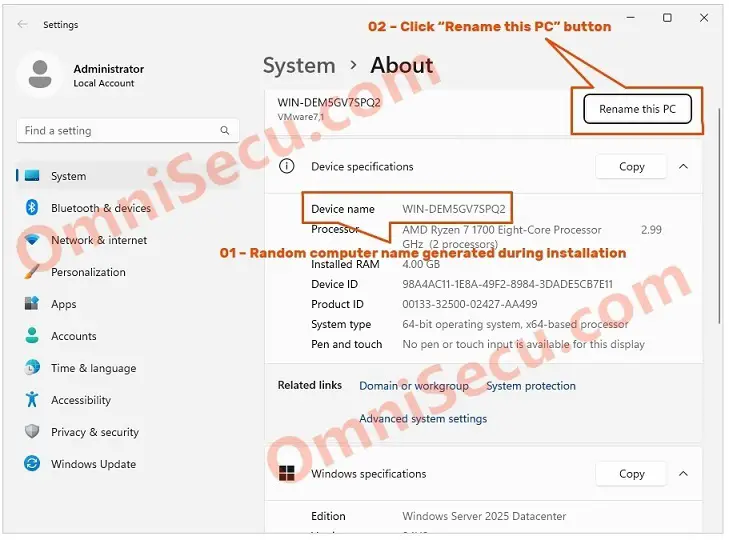
Step 02 – From the System Properties > About, you can see the default random computer name generated during the Windows Server 2025 installation. Please check the string after "Device name" to see the current random computer name, generated during the Windows Server 2025 installation.
Click the "Rename this PC" button to change the Windows Server computer name. Please refer below image.

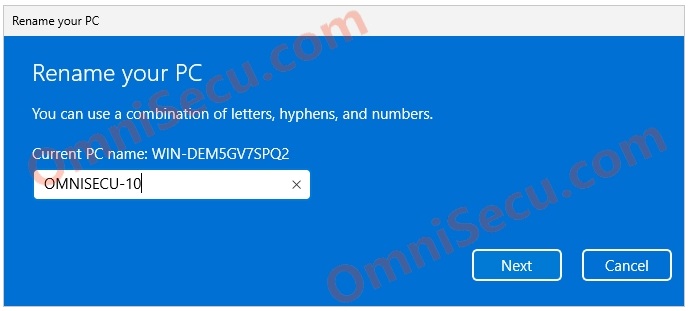
Step 03 – Enter the new computer name for your Windows Server 2025, in "Rename your PC" dialog box, as shown in below image. In this case, the new computer name for Windows Server 2025 is given as "OMNISECU‐10". Please note that you can you only letters, numbers and hyphens to create a computer name.
Click the "Next" button in "Rename your PC" dialog box.

Step 04 – In the next screen of the "Rename your PC" dialog box, you can see an information that the Windows Server computer name will be renamed after a computer restart.
Click the "Restart now" button to restart the Windows Server and to make the Windows Server computer rename in to effect.

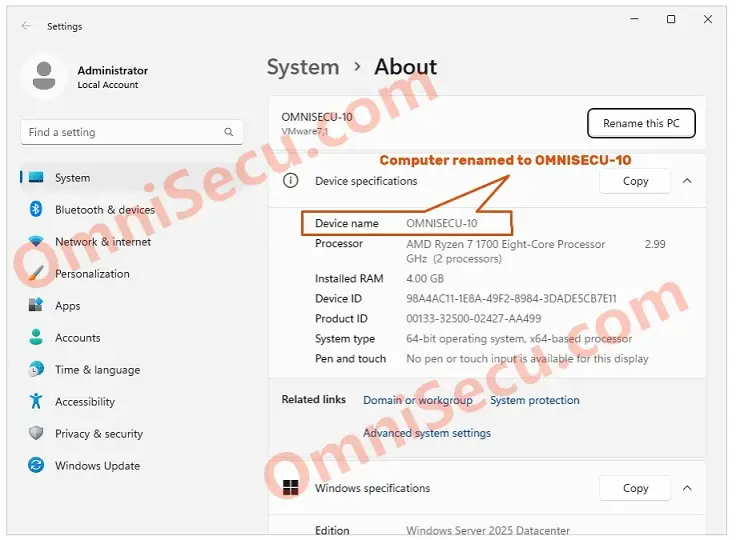
Step 05 – Now, to make sure that the Windows Server is renamed, again visit the System Properties > About page, as explained in the first step.
You can see that the Windows Server 2025 computer is renamed as "OMNISECU‐10".

Written by Jajish Thomas.
Last updated on 2nd June, 2024.