How to Remove Roles and Features in Windows Server
In this lesson, let us learn how to remove Roles and Features from a Windows Server using Server Manager. In this example, we are going to remove "DHCP Server" Role and "Remote Server Administration Tools > Role Administration Tools > DHCP Server Tools" Feature from a Windows Server 2025 computer.
If you are new to Roles and Features in Windows Server, please click the following links to learn what are Roles and Features in Windows Server, Roles in Windows Server and Features in Windows Server.
Click the following links to learn how to add Roles and Features in Windows Server using Server Manager, how to add Roles and Features using PowerShell and how to remove Roles and Features using PowerShell.
Please watch below steps to learn how to remove Roles and Features from a Windows Server.
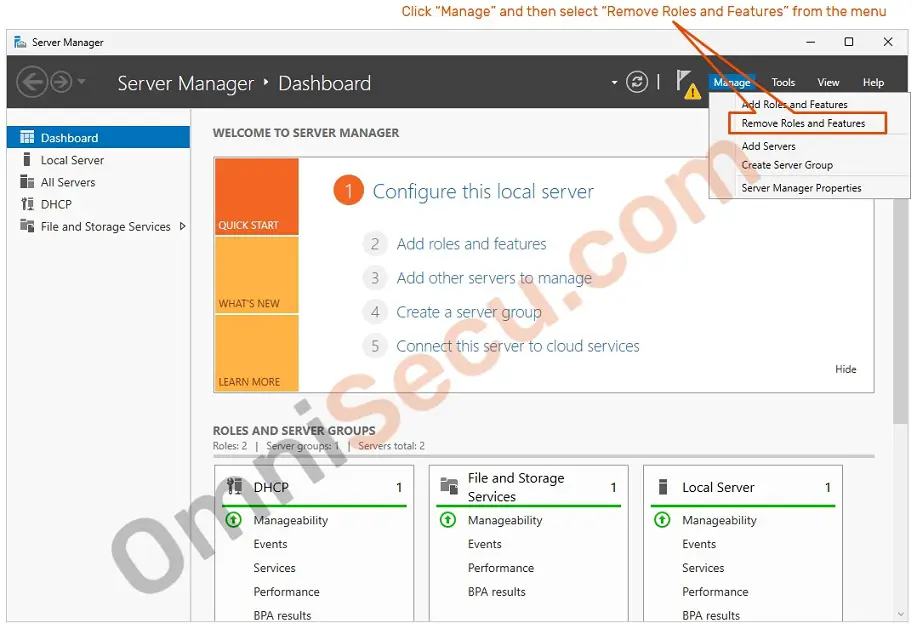
Step 01 – First, open Server Manager tool by typing Server Manager at Windows Server search box and then by clicking the search result. In Server Manager, click "Manage" and then select "Remove Roles and Features" from the drop-down menu, as shown in below image.
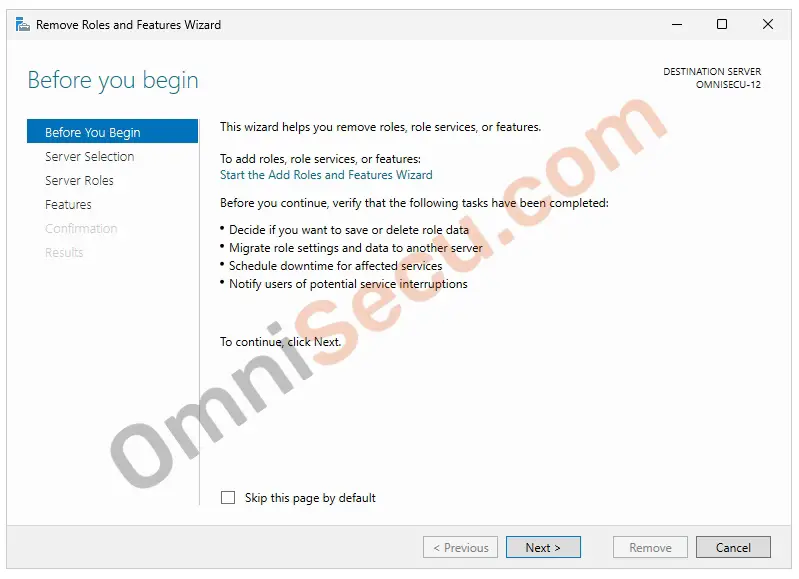
Step 02 – "Remove Roles and Features Wizard" will be opened as shown in below image. A general introduction about "Remove Roles and Features Wizard" is shown in the first screen. Click the "Next" button in this first screen of the "Remove Roles and Features Wizard".
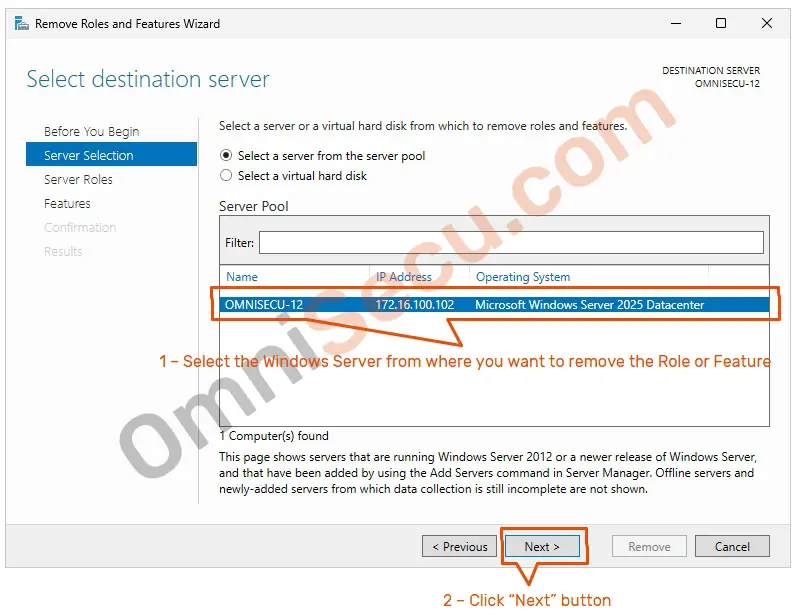
Step 03 – Select the Windows Server from where you want to remove the Role and/or Feature (Destination Server). As per your requirement, you may remove Roles and Features from a Virtual Hard Disk file also.
In this case, I had selected the local server "OMNISECU–12", which is a Windows Server 2025 based server. Click the "Next" button to continue. Please refer below image.
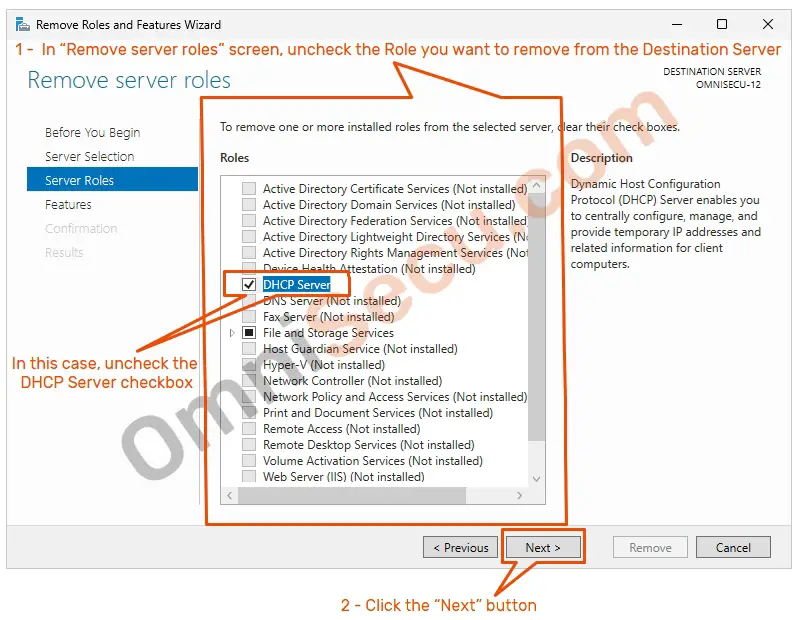
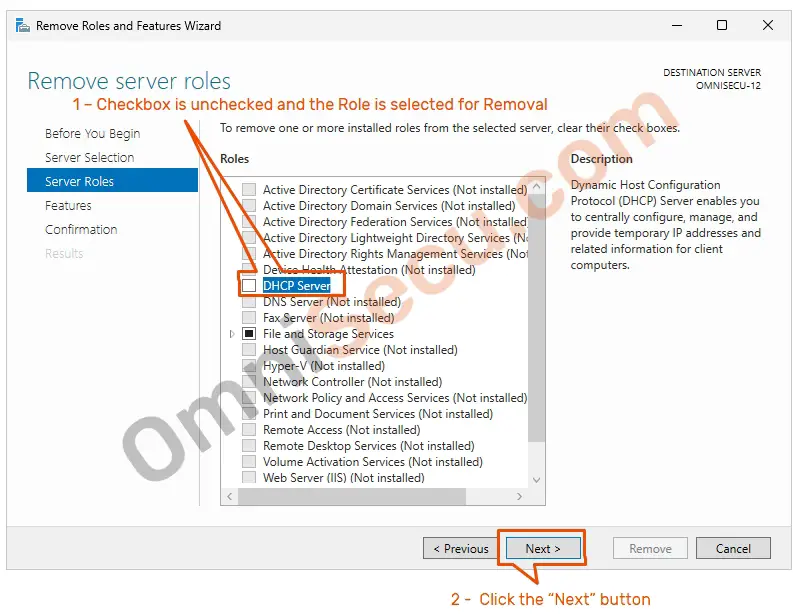
Step 04 – In "Remove server roles" screen of the "Remove Roles and Features Wizard", uncheck the Role you want to remove from the Destination Server. In this example, I had unchecked the "DHCP Server" role to remove.
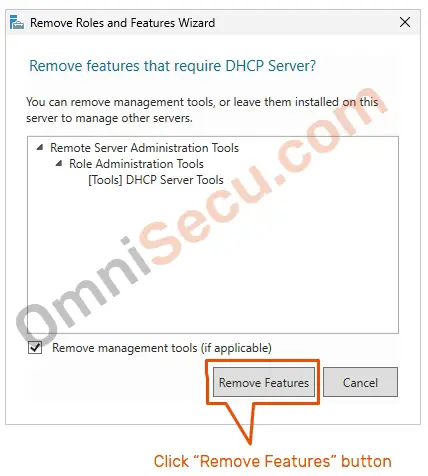
When you click the checkbox to uncheck and remove the Role, you will be prompted to remove the Feature added to manage the selected Role also. In this case, I had opted to remove the Feature. Here, you will be prompted to remove the "Remote Server Administration Tools > Role Administration Tools > DHCP Server Tools" Feature. Click "Remove Features" button, as shown in below image.
You can see that the Checkbox is unchecked and the Role is selected for Removal. After making sure that the checkbox is unchecked for the required Role, click the "Next" button to continue, as shown in below screenshot.
In case, if you are not sure what DHCP (Dynamic Host Configuration Protocol) is, please refer the following links to learn more about DHCP.
• What is DHCP and How DHCP works
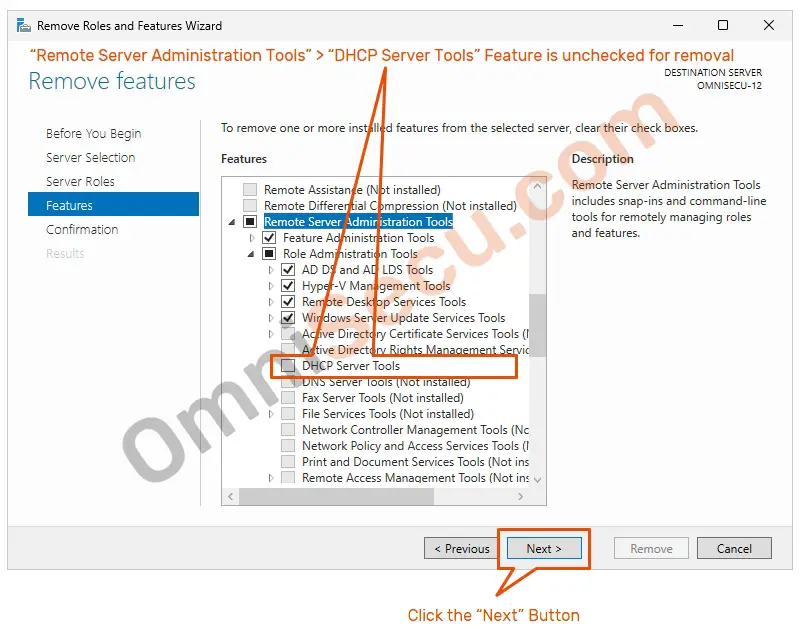
Step 05 – "Remove Roles and Features Wizard", "Remove features" screen, the "Remote Server Administration Tools > Role Administration Tools > DHCP Server Tools" Feature is unchecked for removal, as shown in below image. Click the "Next" button to continue.
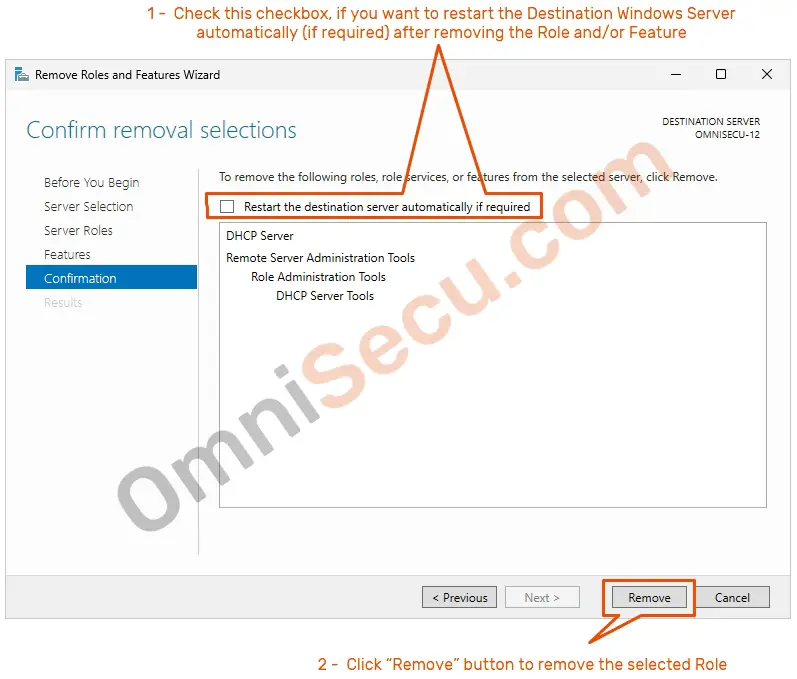
Step 06 – In "Confirm removal selections" screen of the "Remove Roles and Features Wizard", check "Restart the destination server automatically if required" checkbox, if you want to restart the Destination Windows Server automatically (if required) after removing the selected Roles and Features from the destination Windows Server. Click "Remove" button to remove the selected Roles and Features, as shown in below screenshot.
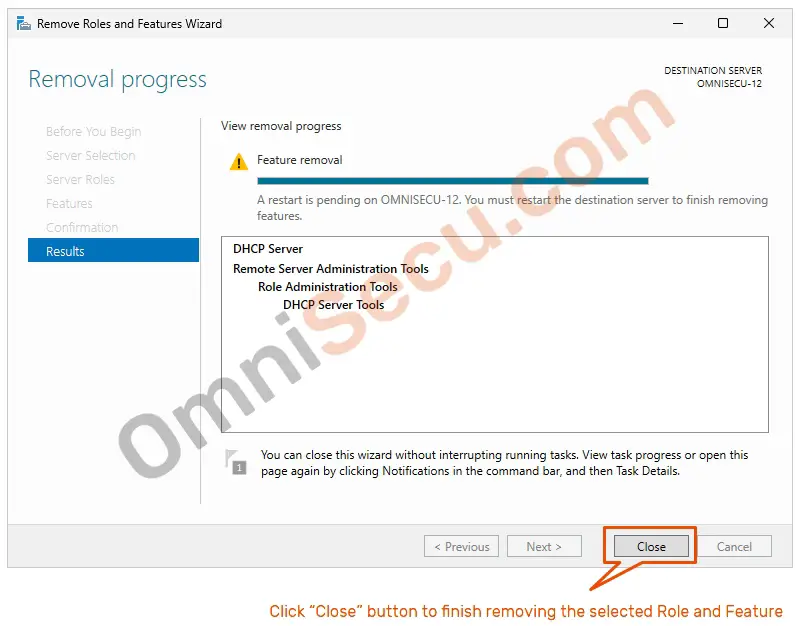
Step 07 – Click the "Close" button to complete removing the Role and Feature from the Windows Server and to exit "Remove Roles and Features Wizard", as shown in below image.
The selected Role and Feature are now removed from the destination Windows Server. Please refer below image.
Written by Jajish Thomas.
Last updated on 10th July, 2024.