How to hide files and folders using Windows File Explorer
Sometimes you may need to hide some important files or folders. By hiding the files or folders, we can prevent from others accessing the files and folders, viewing it, deleting it or modifying it. We can use Windows File Explorer to hide a file or a folder.
Follow below steps to hide a file or folder using Windows File Explorer.
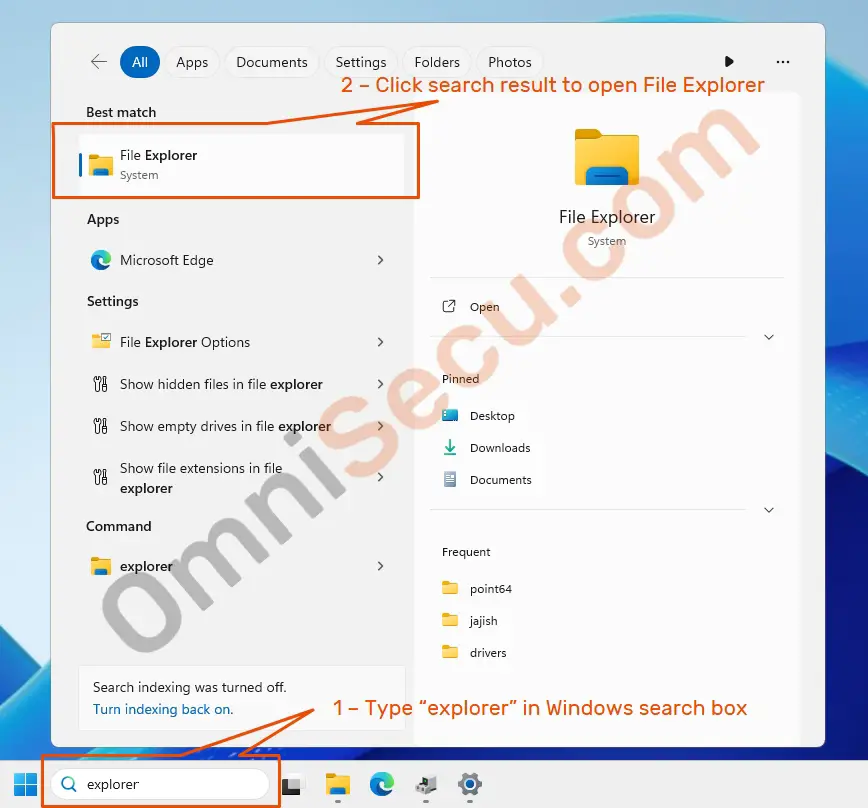
Step 01 – Open Windows File Explorer by typing explorer at the Windows search box and then by clicking the search results, as shown in the below screenshot.

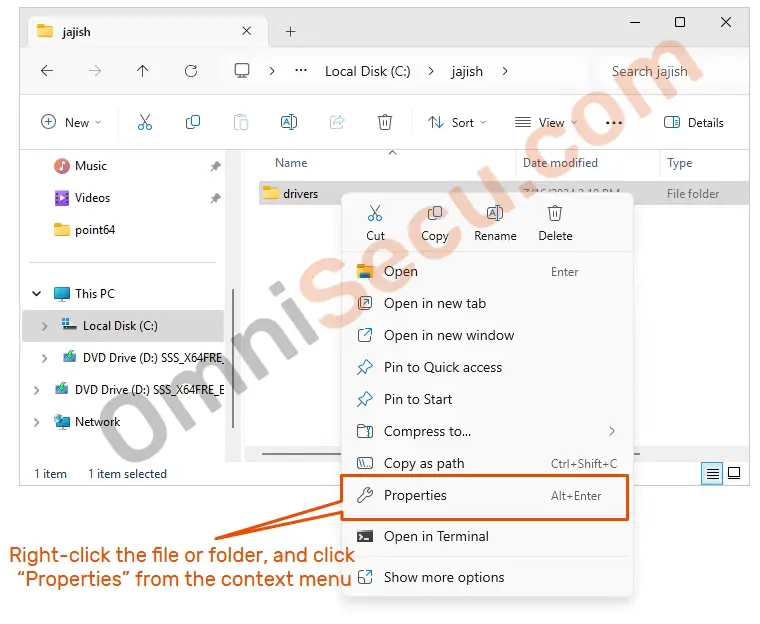
Step 02 – Select the file or folder you want to hide in Windows File Explorer. Right–click the file or folder and then select "Properties" from the context menu, as shown in the below screenshot.

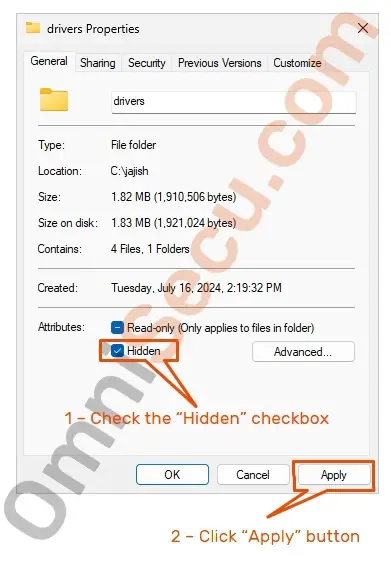
Step 03 – From the file or folder Properties, check the "Hidden" checkbox and then click the "Apply" button, as shown in below screenshot.

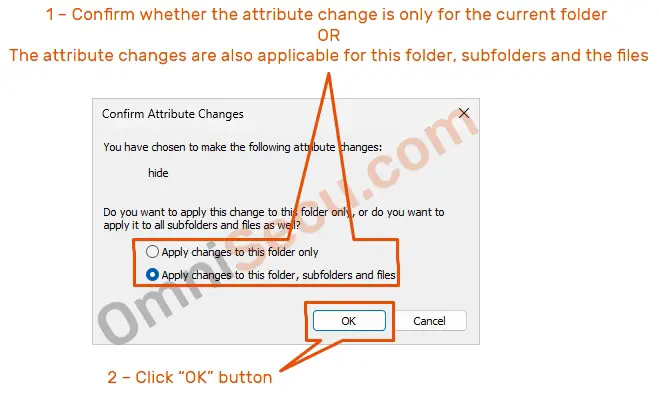
Step 04 – In "Confirm attribute changes" dialog box, confirm whether the attribute change is only for the current folder or the attribute changes are also applicable for this folder, subfolders and the files. Click the "OK" button. Please refer below screenshot.

Click "OK" button in parent dialog boxes also, to hide a file or folder.
Written by Jajish Thomas.
Last updated on 16th July, 2024.