How to enable or disable a local user account
Before continuing, please visit the following links to learn what are local users and how to create a local user in Windows Server 2025.
Sometimes, we need to disable a local user account or enable a disabled local user account in Windows Server. A disabled local user account cannot login to a Windows Server Operating System. We can a disable a local user account or enable a disabled local user account using Computer Management MMC snap–in.
Follow below steps to disable a local user account or enable a disabled user account in Windows Server.
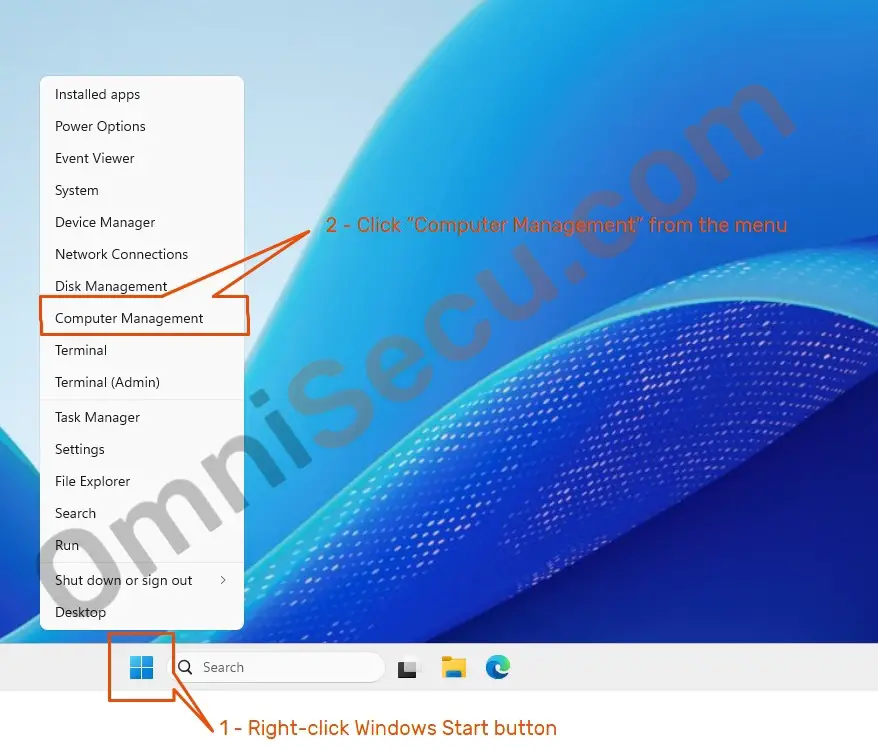
Step 01 – Open Computer Management MMC snap–in by right–clicking the Windows start button and then selecting Computer Management from the menu. You can also open Computer Management MMC snap–in, by typing compmgmt.msc in Windows Run dialog box and then by click the "OK" button. Another way to open the Computer Management MMC snap–in is, search for compmgmt.msc in Windows Search box and then click the search result.

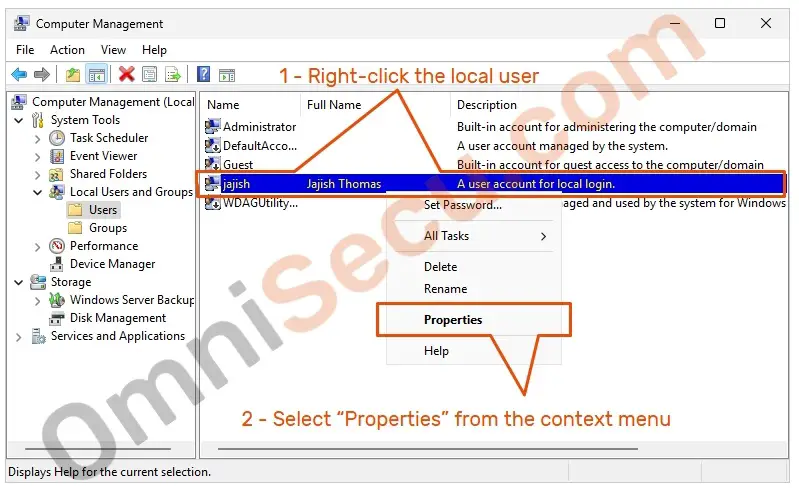
Step 02 – Open "Local Users and Groups" and then "Users" folder inside Computer Management MMC snap–in. Right–click the user you want to change his password on his next login and then select the "Properties" from the context menu, as shown in below image.

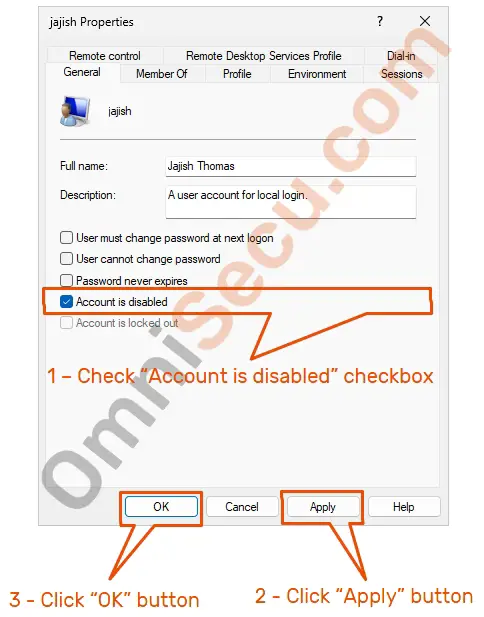
Step 03 – Click and open the "General" tab of the local user Properties Window. Check the "Account is disabled" checkbox to disable the local user account, then click the "Apply" button and the "OK" button, as shown in below screenshot.

 Please note that when the "Account is disabled" checkbox is checked, the local user account is disabled. When the local user account is disabled, the user cannot login to the Windows Server Operating System.
If the "Account is disabled" checkbox is unchecked, the local user account is enabled and the user can login to the Windows Server Operating System.
Written by Jajish Thomas.
Last updated on 2nd August, 2024.