How to enable a device using Device Manager
We may need to enable a hardware device which was disabled before. Follow below stops to enable a device using Device Manager.
Please click following link to learn how to open Device Manager tool and how to disable a device using Device Manager.
You must be a Windows Server administrator to enable a hardware device. Click the following link to learn How to run PowerShell as administrator, and how to run PowerShell as administrator in Server Core. Same method, you can run any other app as administrator in Windows Server.
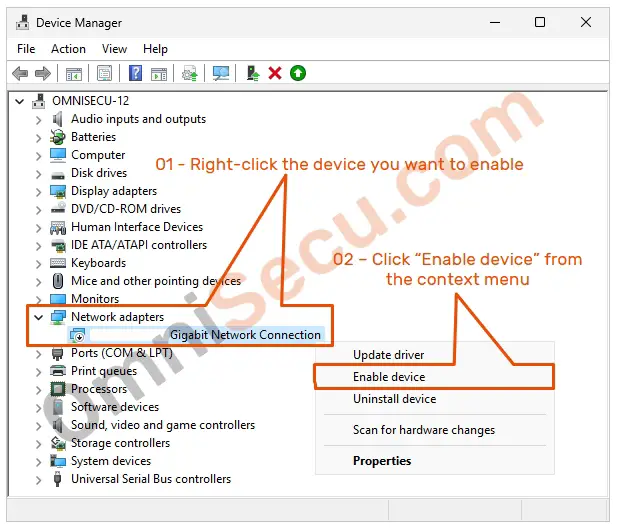
Step 01 – Select the device you want to enable in Device Manager. In this example, I had selected an Ethernet Network adapter, which is already in the disabled state. Right–click the selected device and click "Enable device" from the context menu, as shown in the below screenshot.

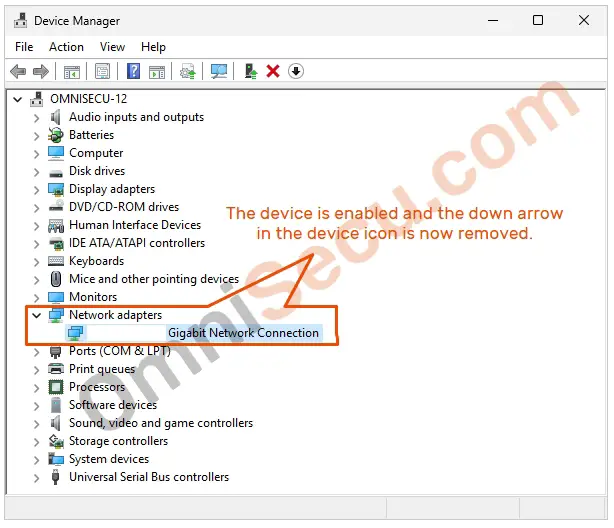
Step 02 – The device is enabled in the Device Manager. The device icon with the down arrow in Device Manager is changed to its original icon, when the device is enabled. Please refer below screenshot.

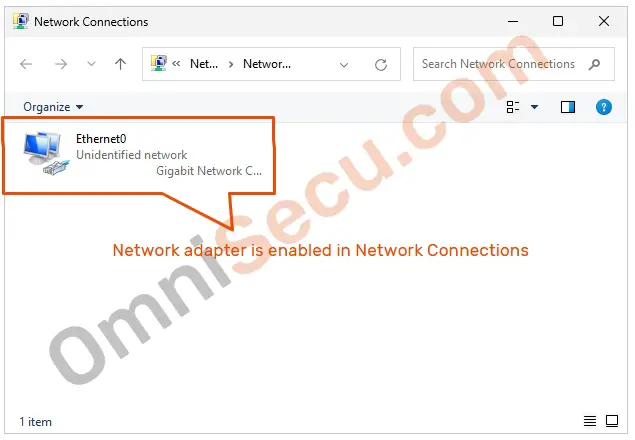
Step 03 – In this example, to confirm whether the device is enabled or not, open "Network Connections" by typing "ncpa.cpl" in Windows Search box and then by clicking the search result. You can notice that the Ethernet adapter is enabled in "Network Connections". Please refer below screenshot.

Written by Jajish Thomas.
Last updated on 13th July, 2024.